Accuracy-Sensing Smart Sports Rebounder with ESP32
- EST - Austin

- Apr 14, 2023
- 18 min read
Updated: Apr 16, 2023
Foreward
I created a smart sports rebounder using 4 x acceleration sensors (accelerometers) with an ESP32 microcontroller and machine learning (neural network) to calculate and log a soccer ball's bounce position. This article touches on different aspects of mechanical, electrical, and software engineering, which, when utilized together, can create powerful results! I hope you find this open source project educational and informative.
[Demonstration video link is forthcoming.]

Article sections
Introduction
Supplies
Mechanical Hardware
Electrical Hardware
Microcontroller Programming
Machine Learning
Structure
Training
Result
Real-Time Operation
Conclusion
Introduction
Most sports projects and commercial products utilize a vision system when they want to track the position of a ball, for example in this project by Youtuber Stuff Made Here, where he created a moving basketball hoop that doesn't let you miss a shot.
Such systems are inspiring and impressive, but most require a vision system to track the ball's flight path. If the camera lens gets wet, dirty, or obstructed, or if the lighting is insufficient, this can affect the tracking results. I wanted to build a sports training tool that (1) doesn't require a vision system, (2) can be used at night, and (3) can be implemented with a low-cost microcontroller. Sports rebounders are perfect candidates for such a tool, because the meaningful training data has to do with the impact of the ball, not its flight through the air.


Rebounders are simple and self-explanatory - you throw or kick a ball at a springy backboard, and the ball is rebounded back to the player. The vast majority of rebounders on the market today don't provide measurements or feedback to the player. The closest thing I've found to a non-vision based bounce tracking system is this commercial trampoline system, which uses a proprietary algorithm/calculation to identify bounces.
The idea I wanted to try for myself is to mount 4 x accelerometers on a rebounder net. These types of sensors output the acceleration along 3 x axes, as well as the rate of rotation about those 3 x axes. I could have tried collecting the acceleration data and then teasing the ball landing position out from it using a closed-form equation or algorithm, but given their rise in accessibility in the last few years, I realized that machine learning would be perfect for this application.

Neural networks are one such type of machine learning - they are based our understanding of how neurons in the human brain are believed to operate, and they excel at modeling relationships between input (the accelerometer data) and output (any information we want to learn about the ball impact.) In the end, this machine learning structure was able to infer the soccer ball landing position with surprising accuracy!
Disclosure: Some of the links in this article are affiliate links. This means that, at zero cost to you, I will earn an affiliate commission if you click through the link and finalize a purchase.
Supplies
1 x 3-foot piece of 1/2" EMT conduit
Roughly 18 feet of 3/4" EMT conduit
Various bolts (1/4"-20 thread, #2 self-tapping, etc.)
1 x 18 thickness black Nylon net with rope border, 15 rows x 15 columns with 1-1/4" squares
2 x Yards of 210 Denier black Nylon coated fabric
1 x USB-C cable
1 x ESP32-based custom PCB (bill of materials included below.)
1 x Hammond black ABS enclosure for the PCB, part number 1593LBK
2 x 5mm LED holder
Laptop or PC to run Python scripts
1 x USB Webcam
(Optional) 1 x Voxelab Aries FDM 3D printer (or equivalent FDM 3D printer)
(Optional) - Brother SE600 Sewing and Embroidary machine (or equivalent sewing machine)
Mechanical Hardware
I created the rebounder frame out of cheap and readily-available metal tubing called EMT (electrical metallic tubing) conduit, which is typically used by electricians for construction wiring, but has grown increasingly popular in recent years for home projects. I cut the tubes to length and removed their sharp edge (deburred them) using a rotary deburring tool for the inner diameter (ID) and a hand file on the outer diameter (OD.) I used a conduit hand bender tool to make the corners. These 3/4" conduit pieces were connected end-to-end using metal set screw couplings.


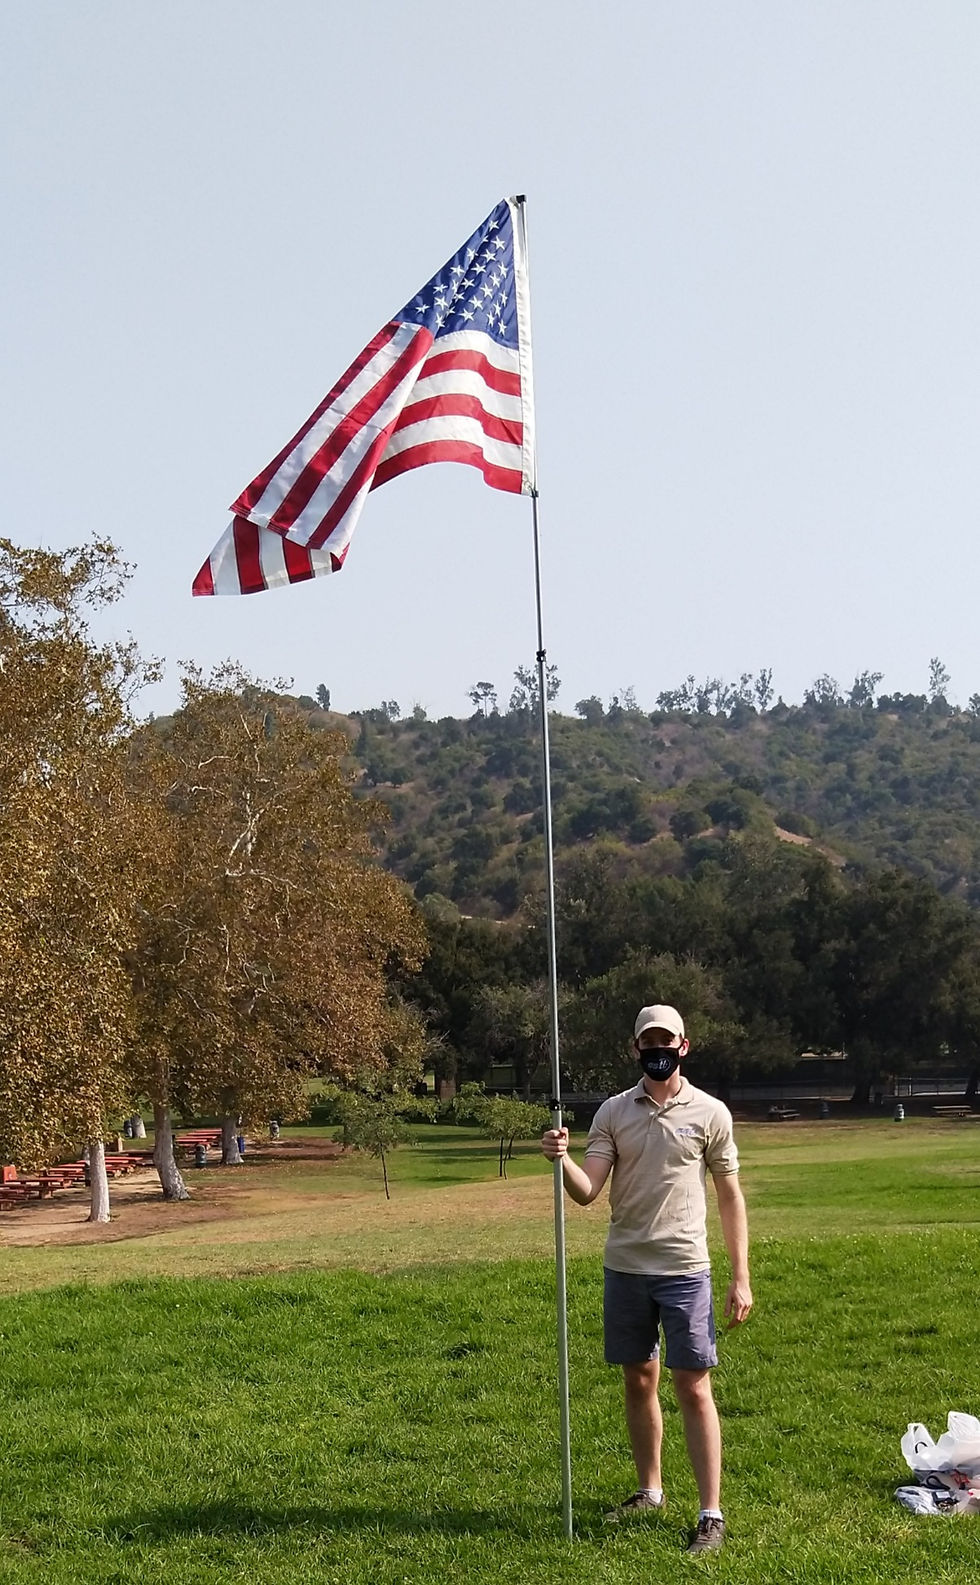
On the rear of the frame, I used 4 x U-shaped metal hinges plus shoulder bolts to allow the frame tilt angle to be set. A center pole made from 1/2" conduit and 3/4" conduit utilizes an EMT conduit telescoping coupling to lock the tilt angle. This coupling is available in my online store, with free shipping available for all orders in the USA. Shipping to Canada is also available. To ensure all pieces would fit together, I modeled the PCB, enclosure, and EMT conduit telescoping pole using Autodesk Fusion 360. The CAD model render is below, along with the actual assembly.


I drilled holes in the sides of the front frame using a cheap drill press, installed rivet nuts (rivnuts) using this tool, and then threaded metal #8-32 thread, 1-7/8" J-bolt into them, locking the position with an extra nut. These hooks are used to hold the elastic shock cord (bungee cord) which loops through the outer edge of the net.

The #18 black Nylon net was a custom order, and the frame size was designed to both accommodate the net and also easily fit in my car. I used continuous bungee cord to allow the net to spring back, but individual bungee cords or metal springs would have sufficed as well. I initially planned to take advantage of the mechanical response of bungee cord in order to provide an optimal ball bounce - that's a topic I may cover in a future article. I tested the mechanical response of shock cord samples for different diameters from different vendors, and I ultimately decided on this 1/4" diameter shock cord.

I made a cover for the rebounder made from 210 Denier black coated Oxford nylon fabric with 1/8" small-diameter bungee cord around its outer edge. I marked and cut the fabric with scissors, laid the bungee cord around its outer edge, folded and then sewed the fabric edge using a Brother SE600 sewing machine - I bought this machine because it also does multi-colored embroidary, which I utilized for another project. Along the top edge of the fabric cover, I used a hammer + hole punch with a metal grommet to mount the front-facing RGB LED using this plastic retainer. The inner edge of the fabric cover is reinforced using 4 x strips of 1-inch wide Nylon webbing, which I sewed in place. The center of the net features a target ribbon held end to end with adhesive hook and loop.


For extra cushioning, I cut 1-1/2" lengths of Buna-N foam tubing and added it onto the corners of the frame. For indoor testing, I designed and 3D-printed these anti-slip clips with double-sided tape on the underside. For outdoor testing, I created these 3D-printed stakes that are pressed into the ground. Because the rebounder uses accelerometers to take measurements regarding the ball impact, it's important that the frame remains stationary during use, and that it doesn't tip or slide.


All 3D-printed files are available on my Thingiverse page!


Electrical Hardware
The 4 x MPU6050 accelerometers are mounted equidistant from the center of the rebounder net, each using a 3D-printed mount with zip ties. Each accelerometer is attached to its mount using 2 x M2.5 screws that self-tap into the 3D-printed plastic. Although the MPU6050 is admittedly antiquated, they turned out to be sufficient for the machine learning aspect of this project. Each accelerometer is connected to the control PCB via its own cable consisting of 4 conductors for power (3V3), ground, SDA and SCL for I2C communication protocol.


I soldered the cable wires directly to the accelerometer breakout board's header pins, and reinforced the connection with black hot glue. For the next version of this project, I would replace the 3D printed mount and the breakout board with a dedicated PCB of the same shape and zip tie it directly to the net. I would additionally a dedicated cable connector directly to that PCB to minimize the risk of wire and solder joint damage.
First, I verified the circuit using a solderless breadboard with an ESP32 dev board and a TCA9548 breakout board. After verification, I selected an appropriate enclosure, and designed a dedicated PCB to fit inside it:

The custom PCB consists of the following:
ESP32 microcontroller.
I selected this microcontroller because it provides for a future opportunity to use Wifi or Bluetooth wireless communication.
TCA9548 I2C multiplexer.
The MPU6050 communicates over I2C protocol, and each MPU6050 can only be set to one of 2 x distinct I2C addresses. Since I need to take readings from all accelerometers one-by-one, I decided to use a dedicated I2C chip.
In previous testing, I tried selectively turning the accelerometers on and off using their EN pins and read one unit at a time, but I was concerned that that switching might limit my rate of data collection or adversely affect the readings if the accelerometers didn't adequately equilibrate after startup.
USB-C connector with FT231 USB-to-UART converter.
I initially tried using the CP2012 chip as on the Adafruit HUZZAH32 board, but its QFN package was a pain to solder, so I opted to use the slightly more expensive FT231 chip.
Buzzer for user feedback.
Cable connectors for the 4 x accelerometers, the front-facing RGB LED, and the RGB LED mounted on the rear of the PCB enclosure.
The PCB is a simple 2-layer board. Several LEDs indicate whether or not the unit is powered, and if serial communication is taking place. A future design may also include indicator LEDs for each of the accelerometers to show that they are receiving power and communicating with the board. The cables leading out to the accelerometers and their solder joints are at risk of damage from soccer ball impacts, which would make such indicator LEDs useful for debugging in case a connection got damaged.
The PCB is powered via its USB-C connector. A USB cable connects to a PC which runs the machine learning script and logs the ball impact data. The next version of this project may utilize the wireless capabilities of the ESP32 and include a battery so that the USB cable is no longer necessary.
The bill of materials (BOM) for the PCB components from the vendor Digikey can can be found at this link if you'd like to order all the components. Convenient, eh? I included a few extras of the more sensitive components (e.g. FT231XS) in that list, in case you need a spare.

The schematic for the PCB is below. I use KiCAD for my PCB design work - it's open source and I highly encourage anyone interested in learning to check it out! Digikey has an excellent introductory video series here for those interested learning this software and creating their own PCBs. I highly recommend it.

Below is the layout for the PCB. I designed it to fit inside the Hammond 1593 black ABS enclosure. I chose this enclosure due to its size, and because it has two removable panels which can be modified to pass cables through. I 3D-printed replacement panels with cutouts for the rear RGB LED, USB-C cable connector, and the cables leading out to the accelerometers on the net. I modeled the panels in Fusion 360 and printed them on my Voxelab Aires 3D printer, which I've found to be a solid entry-level FDM printer.

The enclosure panels can alternatively be machined on a CNC or manual mill, or laser-cut if a suitable alternative material is used (ABS emits cyanide gas and tends to melt if laser cutting is attemped - acrylic or polypropylene would be suitable alternatives.) Here are the 2D engineering drawings for those panels:
Microcontroller Programming
The ESP32 microcontroller on the PCB is instructed to do the following:
Read the accelerometers.
Calculate the magnitudes of acceleration for the 4 x sensors.
I did this in order to maximize the speed of data transfer to the PC, rather than send the 3 x acceleration values and 3 x gyroscope values, which would have totalled to 24 values for the sensors. It turns out that only the acceleration magnitudes are needed to determine the ball landing position using machine learning.
Send the data to the PC, and receive the ball accuracy result (i.e. accurate, marginal, or inaccurate) from the PC.
Light up the 2 x RGB LEDs and sound the buzzer based on the above command from the PC.
I programmed the ESP32 using the Arduino IDE. You could alternatively use PlatformIO running on Visual Studio, or the Espressif IDE to program the ESP32.
The ESP32 code uses the Adafruit MPU6050 library to grab the accelerometer output. I use an I2C multiplexer (the TCA9548) to iterate through each of the 4 x accelerometers and take readings from them in turn. For each sensor, I read the 3 x acceleration values, calculate the magnitude via the following equation, and then send that single integer value to the PC for each of the 4 x accelerometers.
accel_mag = sqrt(accel_x^2 + accel_y^2 + accel_z^2)

While the ESP32 takes readings, the PC runs Python using the Spyder IDE (downloaded through the Anaconda distribution.) You could alternatively use PyCharm, or any other IDE of choice, to program and run the Python script.
In the ESP32 code, the MPU6050s need to be configured for:
+/- 16g full-scale readings.
This is the maximum range for the MPU6050. The sensor won't take readings larger than its full-scale limit.
Fastest-possible data rate
I needed to read the accelerometers as quickly as possible in order to capture as much data as I could during the ball bounce - an event which takes place over the course of about 0.1 seconds. Taking accelerometer readings more quickly will increase the signal noise, but for this project, it's a necessary tradeoff.
OpenAI's ChatGPT was recently introduced to the world. It's a powerful tool that can assist with engineering prototyping. I asked it to provide me with the commands needed to set the two parameters above, which it successfully did!

Neural Network - Plan
A neural network, which is a type of machine learning, can be thought of as a trainable function: you give it an input, the neural network does something, and then it gives an output. A neural network is structured with so-called neuron elements that take input, and spit out an output based on how their behavior is defined (called an activation function.) Groups of these neurons (called layers) feed their outputs to the next layer, then to the next layer, and so on until the final layer produces its output. During training, that final output is compared to a known "correct answer", and the behavior of the neurons is iteravely tweaked to make them better at predicting the correct output. When this training process is complete, the neural network should be pretty good at guessing the correct output, given an input.
There are many other resources, Youtube videos, and articles that cover neural networks, the types of activation functions the govern neuron behavior, and more in greater detail. Here are a few good resources if you'd like to dive deeper into the subject:
Thankfully, these days you don't need to be an expert to use readily-available neural network tools for your projects. I utilized the Python library Tensorflow which is a popular framework for machine learning, and I opted to use a Recurrent Neural Network (RNN) for this project. RNNs are useful when your input data is time-dependent, and is therefore a good choice for the accelerometers on the rebounder, whose outputs vary in time relative to one another.

The procedure to train the neural network to take in accelerometer readings and spit out the ball landing position is the following:
Collect the raw data from the accelerometers while bouncing the soccer ball on the rebounder.
Parse and separate that data so you have individual sets of bounce data to feed into the neural network.
For each bounce, give the accelerometer data to the neural network and compare its output to the actual ball position (tracked by a webcam.) Over time, as the neural network modifies its behavior (trains), it will improve its ability to guess the ball landing position.
After the training, the neural network should be pretty good at guessing the ball landing position given a set of accelerometer data - no webcam required!
Neural Network - Training
The data you use to train a neural network should encompass all possible cases you may expect to see during operation. In this project, that means soccer ball bounces on the rebounder at many different locations, and of varying velocity at different angles. This will help the neural network to be robust at interpreting the data in those different situations. A typical set of training data can consist of thousands of instances of data. For this project, I bounced the soccer ball on the rebounder about 2500 times at different positions and intensities.
Types of bounces (and combinations thereof):
All positions on the net
Throw speed
Different incoming throw directions
Ball spin
For training, I spray painted the soccer ball screen, pointed a webcam at the rear face of the rebounder, and on the connected PC, ran a machine vision Python script which searches for green pixels in the video feed and tries to fit a circle to them. Simultaneously, the ESP32 PCB read the data from the accelerometers and saved it in one large file on the PC. Here's what the camera saw during training - the red tracer shows the previous movement path of the green soccer ball, which is highlighted in yellow. and animation of the tracked ball position and radius.

Here's a scatter plot of the webcam-tracked ball landing positions. The original data skewed towards the top edge of the rebounder net, so I shifted the data using a bilinear transformation function before proceeding with the neural network training. The user selects a "master" position on the net, and a new position to shift that point to, and all the other data points move linearly along the X and Y directions proportionally to how close they are to the master position and the edges of the net:


Here's the code snippet describing how the webcam tracking data is shifted:

And here's an example showing how such data can be shifted using the above function. Here's the old point locations are blue, the new shifted points are red, and the old and shifted center points are green and purple, respectively. The center point is shifted up and to the left of its original position, and all other points also shift up and to the right depending on how proportionally far away they are from the center point along the X (horizontal) and Y (vertical) directions. Note that the points are constrained so that they can't move outside of the black border.

Next, the raw, large CSV file containing the accelerometer data output by the ESP32 must be segmented into individual bounces. An example of 3 consecutive bounces as they appear in the accelerometer readings is shown below. I identified the start of a bounce as when the acceleration values for any of the sensors exceeded a threshold value (black dashed line), and then I grabbed the next 12 readings. A single set of data for a bounce is therefore 48 readings (12 readings from sensor number 1, followed by 12 readings from sensor number 2, up to sensor number 4).

Next, for each each bounce, we need to identify the associated ball landing position from the webcam data. First, the peaks in the ball radius data are identified using the "smoothed z-scores" algorithm - these radius maximum values correspond to when the ball is closest to the webcam, so the position of the ball at that time is the landing position. Each spike in the accelerometer data is paired with the nearest ball radius peak in time. Now, for each ball bounce, we have a set of accelerometer data, and associated webcam tracking data, i.e. we have the input data and associated correct output data that we can feed to neural network to train it.

As noted earlier in the article, I used a Recurrent Neural Network (RNN), with 4 hidden layers, ultimately spitting out 2 values, each between 0 and 1, corresponding to the horizontal (X) and vertical (Y) landing position. That is, an output of (0.5,0.5) corresponds to the center of the rebounder net. The so-called loss function used to optimize the neural network during training is defined as the distance between the neural network's inferred position versus the actual ball landing position as tracked by the webcam:
Loss = sqrt((X_guess - X_webcam)^2 + (Y_guess - Y_webcam)^2)
As it trains, the accuracy of the neural network increases, and the loss decreases, as it gradually improves its ability to produce increasingly-accurate output. The training was run for 5000 epochs.


Neural Network - Result
Here is a histogram of the neural network's ball landing position error after training. The shape of the histogram hints that the data tends to follow a lognormal distribution, meaning that if you take the mathematical log of the data, it will appear normally distributed (i.e. a bell curve.) This type of distribution is common when the data butts up against a natural limit (in this case, the distance error can't be less than zero.) The left plot (blue) shows the untransformed data, and the right plot (green) shows the histogram of the log of the data, confirming that the distribution is indeed lognormal.


The lognormal confidence interval is one metric that can help us interpret the data. In a nutshell: according to the 95% lognormal confidence interval, 97.5% of the trained neural network's guesses are off by less than 0.84 inch (2.7% of the rebounder net's width) compared to the webcam-tracked result! And, on average, the neural network's guesses are off by 0.19 inch (0.62% of the rebounder net's width.)
Geometric Mean Error | Lognormal 95% Confidence Interval Upper Limit | Lognormal 99% Confidence Interval Upper Limit |
0.19 inch | 0.84 inch | 1.3 inch |
A scatter plot of the webcam-tracked (blue) ball landing positions versus the neural network's output (inferred using only the accelerometer data) is shown below. Most pairs of these points are very close to one another, indicating that the neural network is quite accurate at determining the ball landing position using only the accelerometer data! There are a few outliers in the result (pairs of red and blue points with a large sweeping dashed line connecting them) - the origin of those few discrepancies is yet undetermined. Overall, it's a solid result.

Here are a few ways we can further improve this result:
Collecting more bounce data to train the neural network.
Using faster and more sensitive accelerometers.
Feeding more than just the magnitudes of the accelerations into the neural network.
Improving the webcam tracking by utilizing a higher camera resolution and frame rate camera, and using better lighting to highlight the soccer ball.
Positioning the webcam on the ground so that it doesn't vibrate as much when the ball hits the rebounder net.
Real-Time Operation
Here's a video showing the real-time operation of the rebounder!
[Demonstration video link is forthcoming.]
3D-Printed Files
All files used for 3D printing can be found on my Thingiverse page:
Accelerometer (MPU6050) mount
Frame indoor anti-slip clip for 3/4" EMT conduit
Frame outdoor anti-slip stake for 3/4" EMT conduit
PCB enclosure top panel
PCB enclosure bottom panel
Webcam mount top
Webcam mount bottom for 3/4" EMT conduit
Codes
The code used to create this project can be found on my Github page:
Better_Off_Alone_Test.ino
An RGB LED + Better Off Alone melody test
Adafruit_MPU6050_Test_Clean.ino
Runs on the ESP32-based PCB, reading from the accelerometers and spitting out that data over USB connection to be read by the PC.
Rebounder_Accelerometers_Webcam_Data_Collection_V2_Clean.py
Python script running on PC that reads in the webcam video stream and tracks the green soccer ball, and also reads the ESP32's accelerometer output.
Creates a single large CSV file containing the raw ball tracking (position and radius) data, as well as the accelerometer data for a bounce session. The data from this file is next processed before being used to train the neural network.
Rebounder_Post_Processor_V3_Clean.py
Reads the large CSV file created by the above script and segments it into individual bounces, so that each bounce is associated with 12 data points per accelerometer, and the corresponding landing position as tracked using the webcam.
Used to prepare the data prior to neural network training - this script creates the data file that is fed to the neural network to train it.
Combine_CSV_Files_Clean.py
If there are multiple files from the above Post Processor code, combine them into one CSV file to be fed to the neural network.
Rebounder_Neural_Network_V3_Clean.py
Constructs and trains the neural network using the data from the previous step. Outputs the trained neural network.
Rebounder_Real_Time_Inference_V3_Clean.py
Runs continuously to read the accelerometer data from the ESP32. If a ball impact is detected (i.e. any of the accelerometers' data shoots up), it collects the next 12 data points for the accelerometers and feeds it to the pre-trained neural network to infer the ball landing position. That result is saved to a CSV file along with the time.
In addition, the script judges the quality of the throw by how far the inferred landing position was from the center of the rebounder net, and then sends a single-character command back to the ESP32 (good, marginal, or bad throw), and the ESP32 32 correspondingly lights up its RGB LED.
Conclusion
This proof of concept demonstrates that it's possible to track and log a soccer ball's landing position on a sports rebounder without using a webcam - instead, you can feed the output of several accelerometers into a trained recurrent neural network to determine where the ball landed with high accuracy.
Topics covered:
Electronics prototyping using off-the-shelf development boards.
Mechanical hardware prototyping using low-cost EMT conduit.
PCB schematic and layout design using KiCAD.
3D CAD modeling, 2D engineering drawings, and renders using Autodesk Fusion 360.
Programming the ESP32 with the Arduino IDE.
Improving your code using OpenAI's ChatGPT.
Using Python to:
Read serial data, parse it, plot it, and animate it.
Train a neural network using Tensorflow.
Read and process webcam images using OpenCV.
Next steps:
Test the system with other types of balls (baseball, volleyball, basketball, etc.)
Increase the speed of data collection.
Use more modern accelerometers.
Use all 6 readings (3 x acceleration + 3 x gyroscope) from the accelerometers to infer more information about the soccer ball bounce (bounce intensity, incoming and outgoing velocity and direction.) I can additionally utilize the radius data as it was tracked by the webcam for the neural network training.
Utilize the ESP's Wifi and Bluetooth capabilities to make the system wireless.
Include a rechargeable battery for the unit.
Replace the net's single piece of bungee cord with individual metal springs.
Create and utilize a custom accelerometer PCB, with a dedicated cable connector, and zip-tied directly to the rebounder net.
Any ideas or suggestions you have for this project! Leave your ideas in the comments.
The telescoping coupling used for this project is available for purchase from Elation Sports Technologies:
Check out our other blog posts! To subscribe to our free newsletter, click the Log In button in the top right corner of this page so you never miss a post:
My business offers mechanical and electrical engineering design consulting. I'd be happy to discuss your project's needs to see how we may assist you - simply reach out to schedule a chat.
Thanks for reading!
Austin Allen
Founder and Owner
Elation Sports Technologies LLC

Comments