DIY EMT Conduit Clothesline Pole
- EST - Austin

- Nov 3, 2023
- 4 min read
Do you yearn for the fresh scent of sun-dried laundry but lack a proper clothesline setup in your yard? Or, do you lack a clothes dryer, or would like to dry your clothes naturally and at zero cost? Look no further. In this DIY guide, we'll walk you through the process of mounting a durable clothesline using telescoping Electrical Metallic Tubing (EMT) conduit, a sturdy and weather-resistant material that's ideal for outdoor projects. The telescoping aspect of the mounting pole allows for easier hanging and removal of clothes! Let's get started!


EMT (electric metallic tubing) conduit is a type of steel tubing available from most hardware stores, and is typically used for routing electrical wires in buildings, but has also grown in popularity in do-it-yourself (DIY) projects due to its low-cost, strength, and convenience for purchase. Elation Sports Technologies offers a UV-resistant adapter to easily create a telescoping pole from 1/2", 3/4", and 1" sizes of EMT conduit!
Disclosure: Some of the links in this article are affiliate links. This means that, at zero cost to you, I will earn an affiliate commission if you click through the link and finalize a purchase.
DIY Clothesline Supplies:
1 x J-screw hook (if one end is mounted into wood)
1 x Metal file
(Optional) 1 x Cordless drill
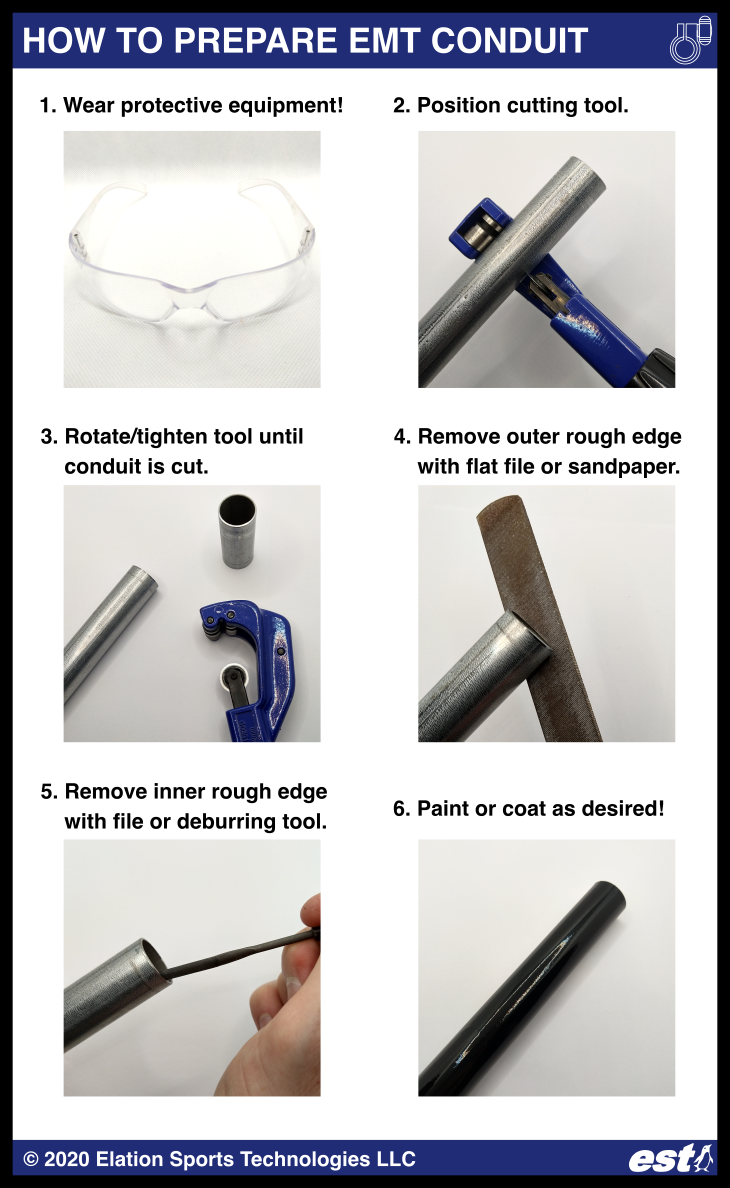
Step 1: Measure and Cut
First, decide if you want to build one or two mounting poles from EMT conduit. In this project, we used a tree as one anchor point for the clothesline, and one EMT conduit pole as the second anchor point, so we only built one pole. Decide on the maximum height of your clothesline pole. For example, if you want a maximum extended pole height of 12 feet, then each of the three sections of the pole will be four to five feet in length in order to have a bit of overlap between the sections. The bottom section will be a section of 1" size conduit, the middle section will be the 3/4" conduit, and the top will be the 1/2" conduit. Measure 5 feet on each piece of conduit using a tape measure, and mark it. Wearing appropriate safety gear (e.g. safety glasses), cut your conduit pieces at the marked points using a rotary tool cutter. Remove any sharp edges or burrs using a rotary deburring tool, metal file, or Dremel tool where needed.
Step 2: Assemble the Pole(s)
These EMT conduit telescoping clamps make it easy to create a telescoping pole out of EMT conduit! They're made of injection-molded UV-resistant and durable plastic which is suitable for outdoor use, and they clamp onto the outside of the conduit - no drilling required! Repeat this assembly process for each pole you will use to help mount your DIY clothesline.

Add 2 x flag clips on the top section of the pole, close to the tip, with one flag clip pointed towards where the clothesline will attach, and the other pointed in the opposite directly. This is where you will attach (1) the clothesline pulley, and (2) the cord that leads to the helix ground anchor which is outlined in the next step. After assembling the pole, add one 20mm black rubber pole cap to the 1/2" EMT conduit top section. Hang one clothesline pulley from the carabiner that will face the clothesline itself.

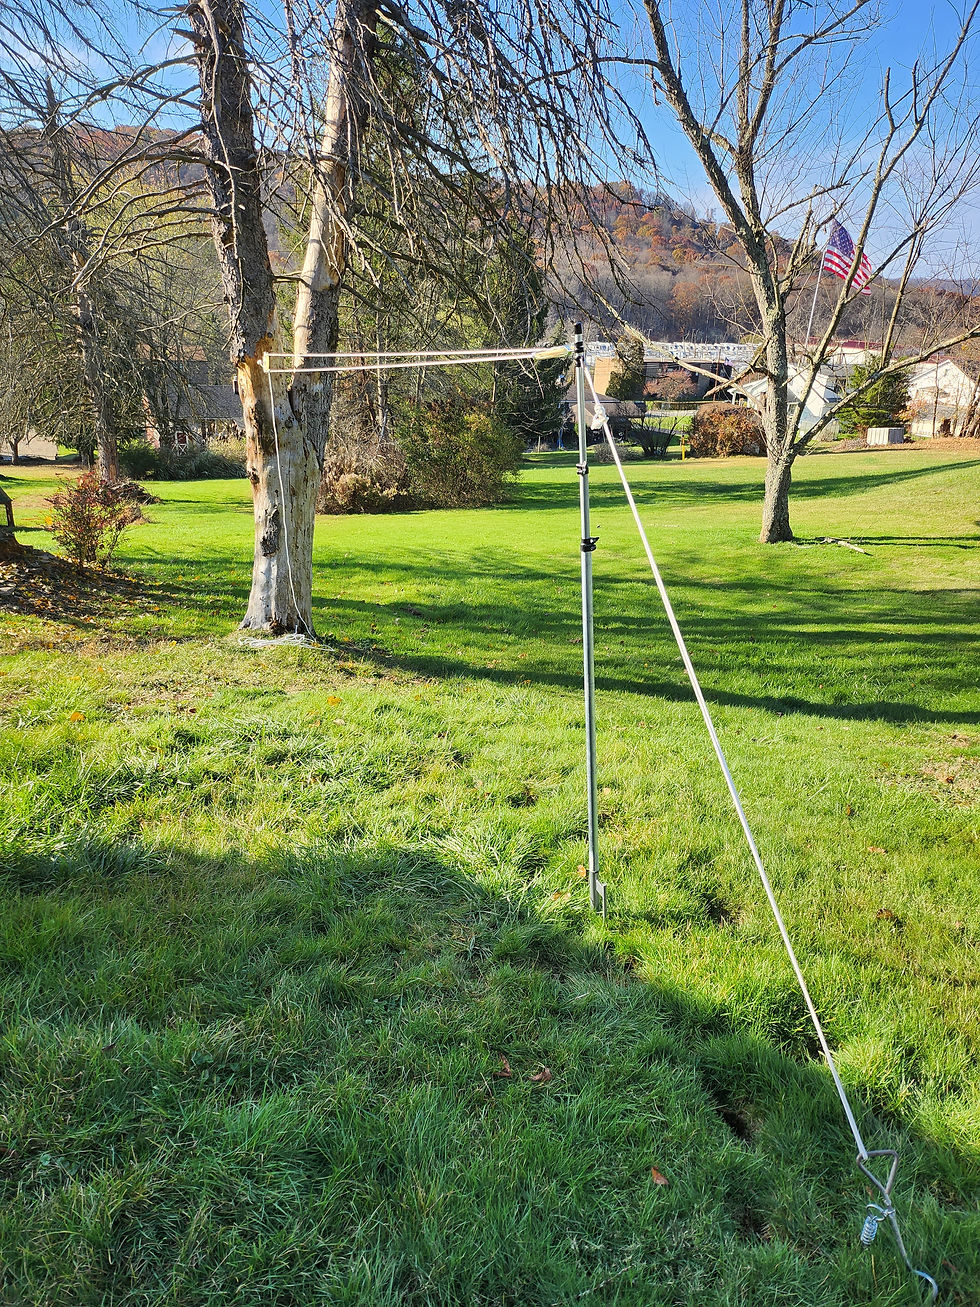
Step 3: Ground Anchoring
Use a tape measure to mark where your pole(s) will be be located. Insert the ground stake into the earth, and then install the bottom 1" EMT conduit end of the pole into the stake. Depending on the EMT conduit vendor, this fit may be a little tight, but this helps to keep the pole sturdy. Manually turn the helix ground anchor several (e.g. 4) feet away from the ground stake to insert it into the earth, and then attach one of the 2 x flag clip's carabiners on the pole to the helix ground anchor using cord, e.g. extra cord that comes with the clothesline pulleys + cord kit.


For this project, the other end of the clothesline is mounted to a backyard tree. A cordless drill with a 1/8" drill bit was used to drill a pilot hole in the tree, and then this J-hook screw was manually screwed into the tree. The second clothesline pulley was then hung from that J-hook.
When both pulleys are mounted, feed the clothesline cord through both of the pulleys, and add tension to it using the tightener/tensioner, a twistable metal piece that comes with the clothesline pulleys + cord kit.


Step 4: Hang Your Clothes!
Use clothespins to hang your wet clothes on your newly constructed clothesline, and enjoy the benefits of zero-cost drying using only sunlight and fresh air! If you need to uninstall the pole or want to move it elsewhere, the telescoping aspect allows you to pack it up, store it, or easily transport it.

Conclusion
In this post, I shared how you can build your own DIY adjustable clothesline mounting poles using EMT conduit! The telescoping couplings used for this project are available for purchase from Elation Sports Technologies:
Check out our other blog posts! To subscribe to our free newsletter, click the Log In button in the top right corner of this page so you never miss a post:
Elation Sports Technologies LLC offers mechanical and electrical engineering design consulting. I'd be happy to discuss your project's needs to see how we may assist you - simply reach out to schedule a chat.
Thanks for reading!
Austin Allen
Founder and Owner
Elation Sports Technologies LLC


Comments